3.1.6:Debugger Tutorials
1. IDE Support
- IAR,Any version, CMSIS-DAP V1 interface
- IAR,>=7.40.2,CMSIS-DAP V2 interface
- Keil,Any version,CMSIS-DAP V1 interface
- Keil,>=5.36,CMSIS-DAP V2 interface
- Segger Embedded Studio,CMSIS-DAP V1 interface
- Segger J-Flash,==V7.22B,CMSIS-DAP V1 interface
- OpenOCD
- PyOCD
- Probe RS
- FreeMASTER,CMSIS-DAP V1 interface
- RT-Thread Studio
- Others to be added
2. Common IDE Setup Methods
2.1 MDK Debug Settings
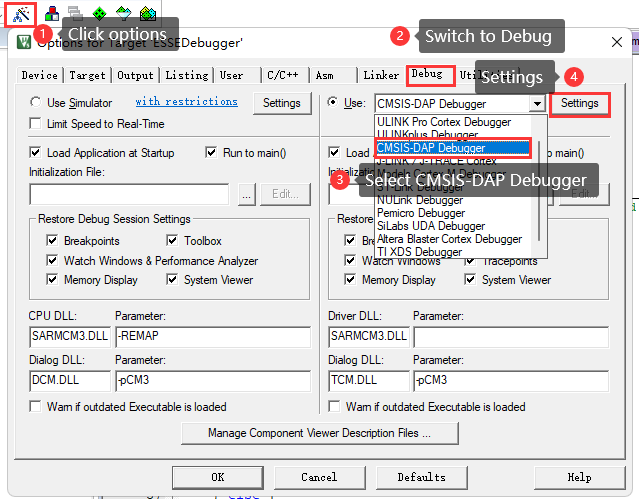
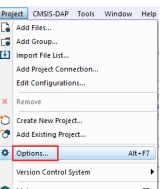
Follow the procedure below to open Project Settings and select CMSIS-DAP Debugger as shown in the following figure:
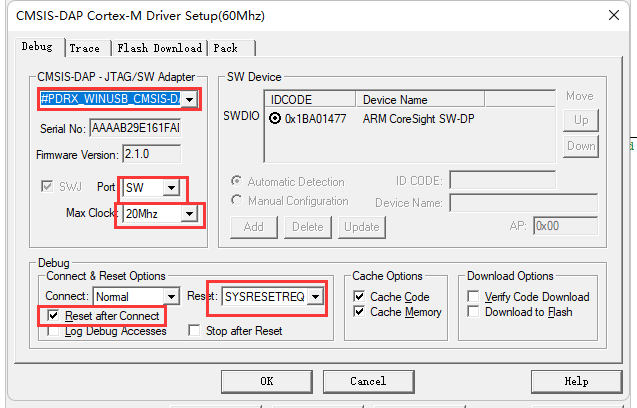
Adjust the basic settings of the debugger according to the following settings, and check whether the target chip is connected normally, as shown in the following figure, after no problem, go to the next step.
Flash Download settings are as follows, according to the actual project requirements, set the appropriate erase method, as well as Program, Verify, Reset and Run options, and add the current chip's flash algorithm, as follows:
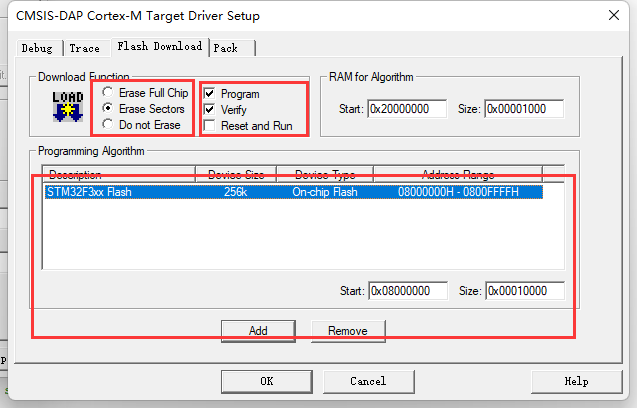
- Erase Method Selection: If you need to keep some data of the chip, such as setting data, signature information, you usually select the erase method as Sector Sections.
- Reset and Run: To perform a reset and run after the current firmware, you need to check the Reset and Run option.
For advanced users, custom debugging settings can be adjusted as needed, as shown below:
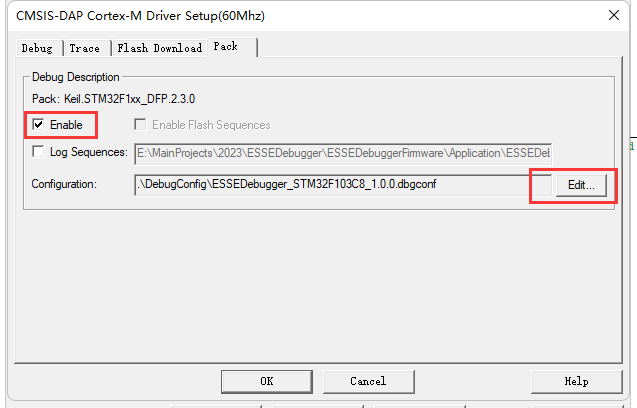
Check the Use Debug Driver option to enable the hardware debugger, this option is turned on by default, if you encounter problems, this option is also a key setting to check, as follows:
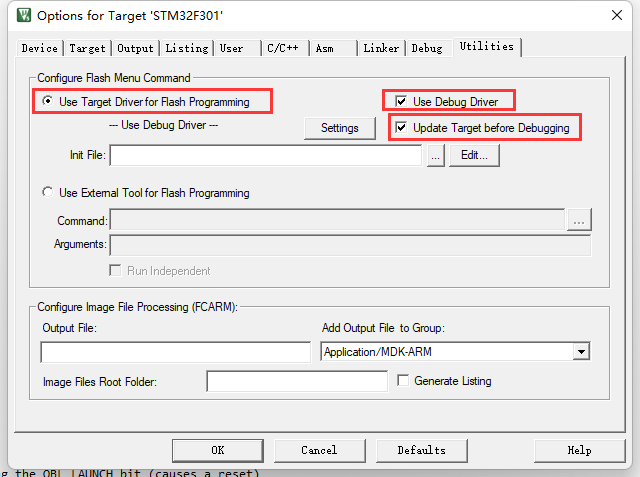
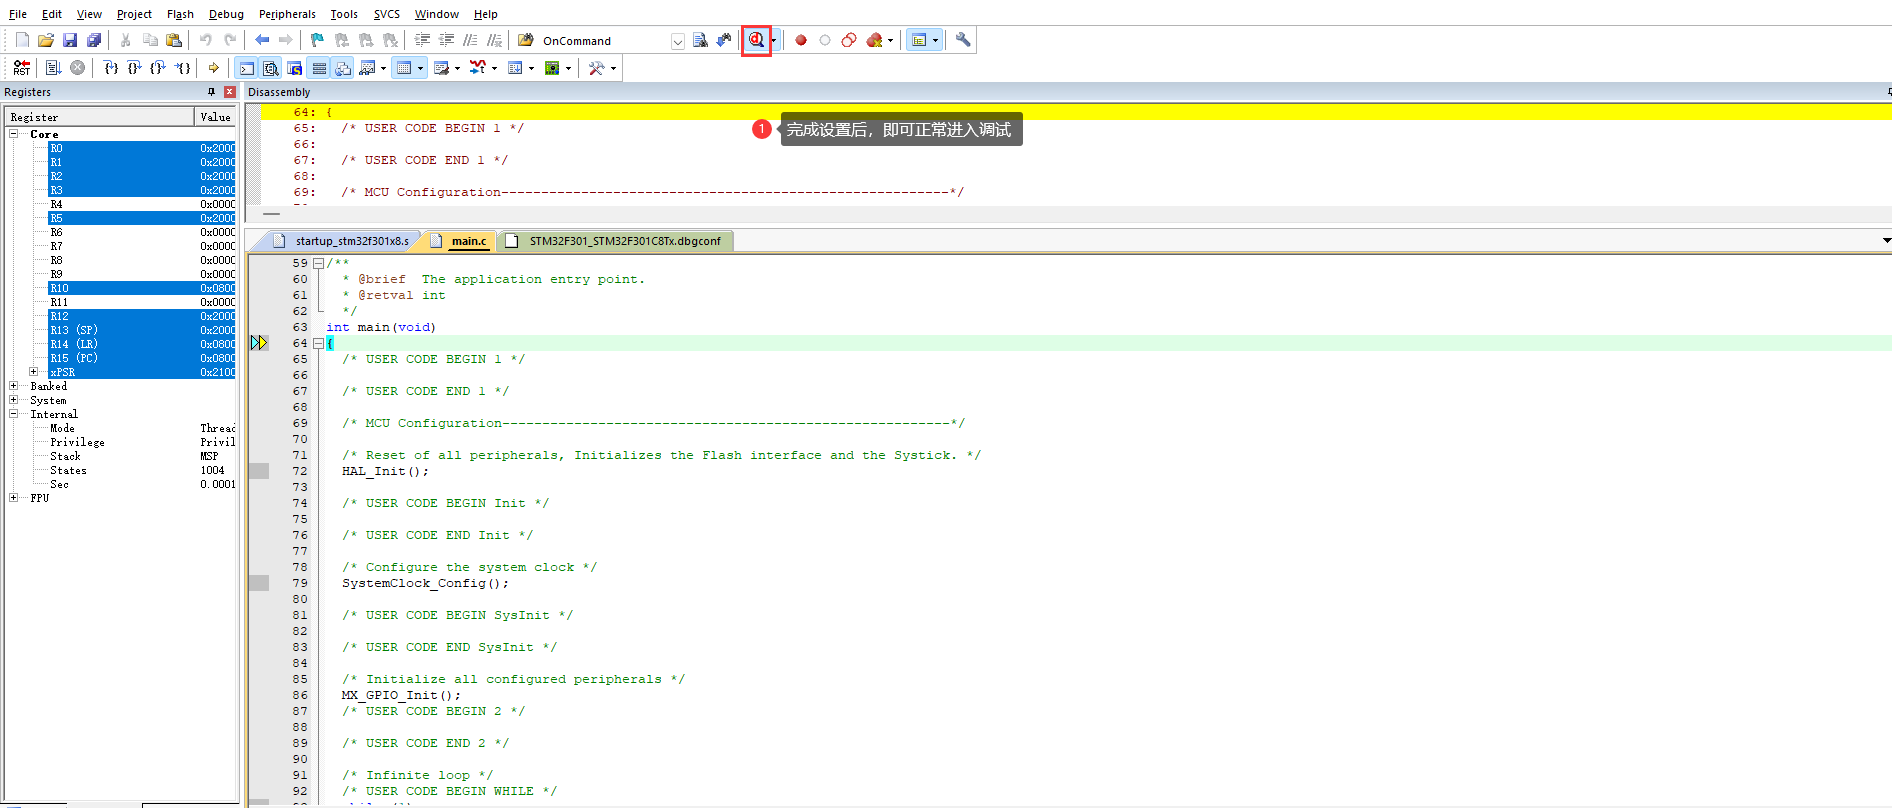
After checking the settings, you can enter the commissioning normally.
2.1.1 Operational Demonstration
2.1.2 Video Demonstration
2.2 IAR Debugging Settings
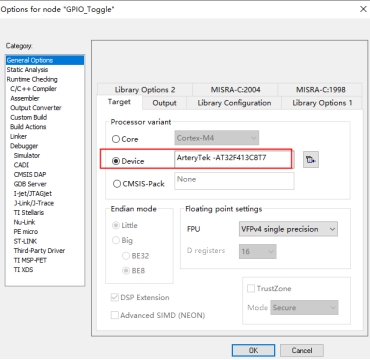
Right click on the item, enter Options setting, switch to General Options standard setting page, and check whether Target -> Device is selected correctly, as shown below.
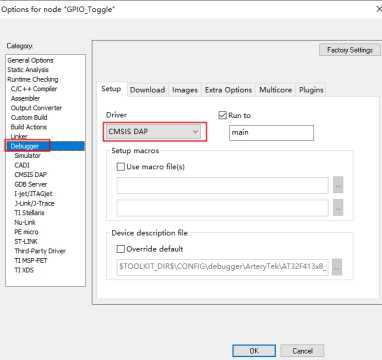
Enter into the Debugger menu, Setup tab page, select Driver as: CMSIS-DAP device, you can check the Run to main option as needed, as shown below.
In the Interface tab of Debugger -> CMSIS-DAP, select the interface as SWD as follows:
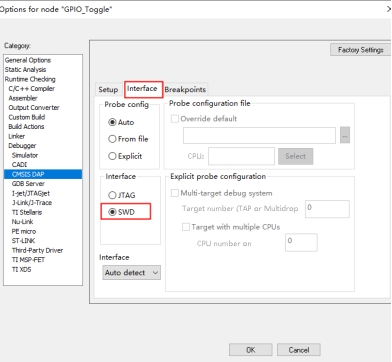
After the above setup you can proceed with the debugging and development of the chip.
2.1.1 Demo Video
2.3 RT-thread Studio Debugging Settings
RT - thread Studio Download Address:https://www.rt-thread.org/studio.html
Go to SDK Manager , as shown below:

Check if the current chip support package, RT-thread source code, and PYOCD are installed.
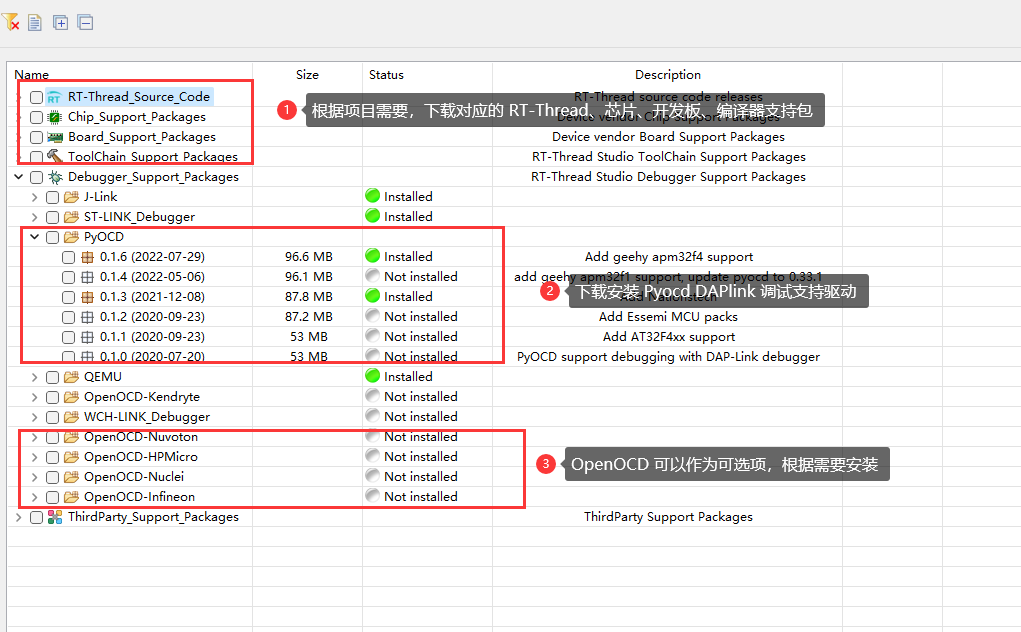
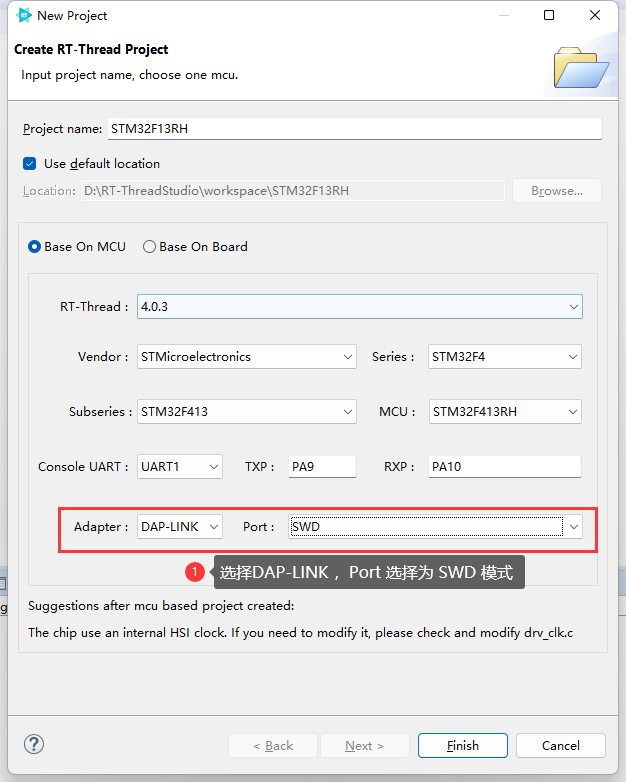
To debug a project through DAPLink, you must use Pyocd or OpenOCD as the debugger's Adapter, and eventually debug through the gdb connection.
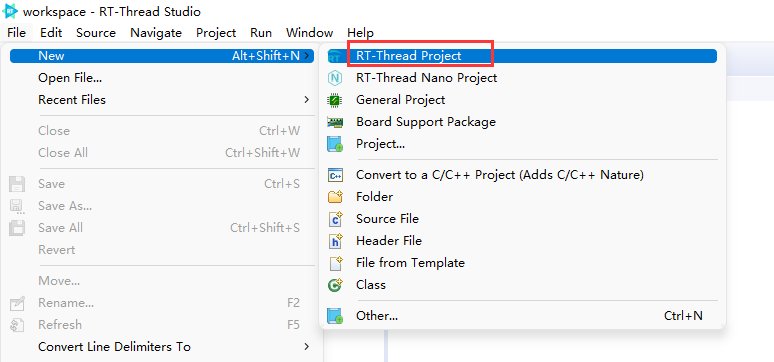
Create a new RT-Thread project as shown below:
Set up the debugger as follows:
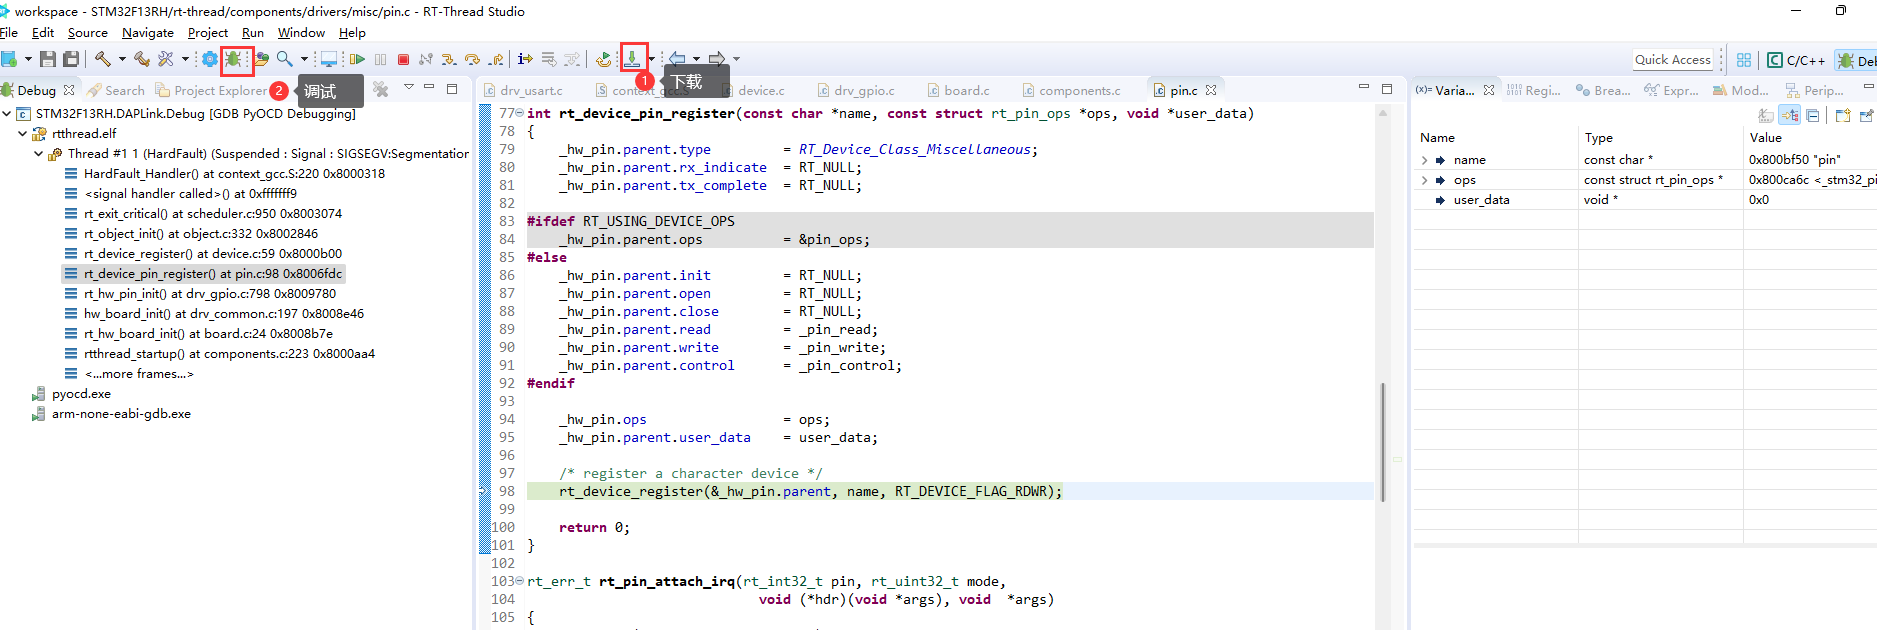
Once the configuration is complete, the project is generated and ready for download and debugging as follows:
It is necessary to have Pyocd or Openocd installed in the SDK-manager.
2.4 Other IDE Tutorials
3. Frequently Asked Questions
3.1 Target Chip Mismatch
Common errors are described below:
- Connection refused due to device mismatch!(Not a genuine ST Device! Abort connection).
- PDSC : Sequence Execution failed.
The above problem may be due to purchasing a chip that is not the original chip, see Target chip mismatch
3.2 Connected device (chip) failure
- No Debug Unit Device found
- SWD/JTAG Communication Failure
- RDDI-DAP ERROR
Details of the above issues can be found in Communication Issues
3.3 Programming Failure
- Flash Timeout. Reset the Target and try it again.
- Error : Flash Download failed - "Cortex-M4"
- Could not stop Cortex-M device!Please check the JTAG cable.
- Error : Flash Download failed - Target DLL has been cancelled
Details of the above problem can be found in Programming Failure
3.4 Verify failure
- Contents mismatch at: 08000064H(Flash=FFH Required=0)
Details of the above issue can be found in Checksum Failure
3.5 Flash configuration error
- Cannot Load Flash Programming Algorithm!
- Overlapping of Algorithms at Address 08000000H
For details of the above issues, please see Flash configuration 1, Flash configuration 1.