3.2.9:Nuvoton extension
Since Nuvoton chips have some special features, such as M481xG with KPROM, XOM, security secret key, etc., the PowerWriter® software puts them under Plug-in Functions, see below:
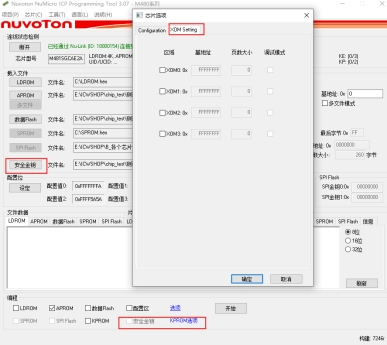
Corresponding to official tools
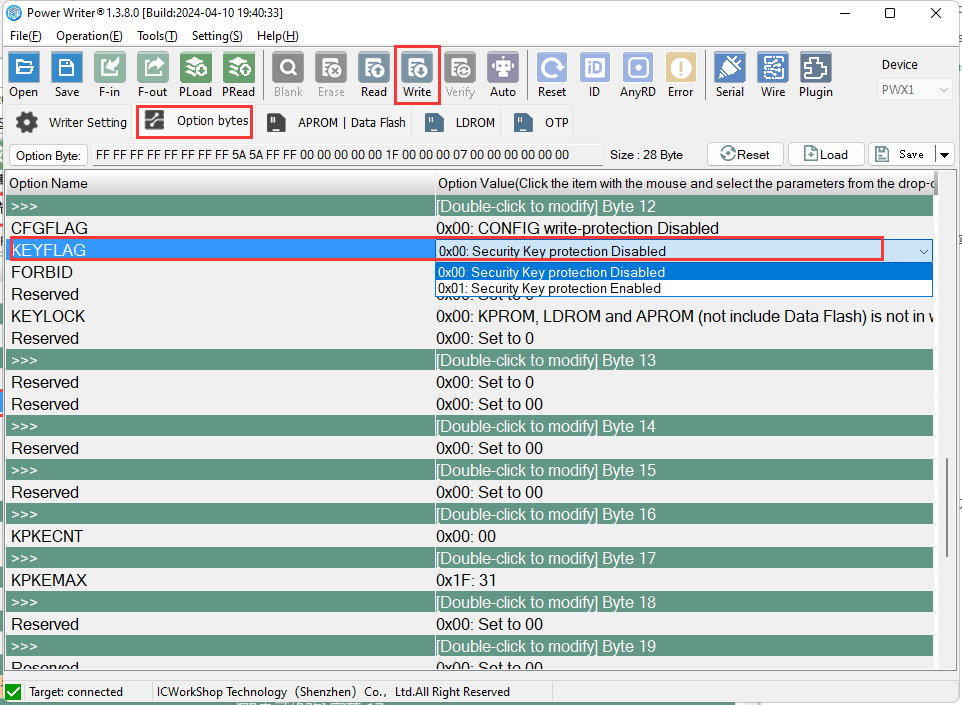
1:KPROM Config
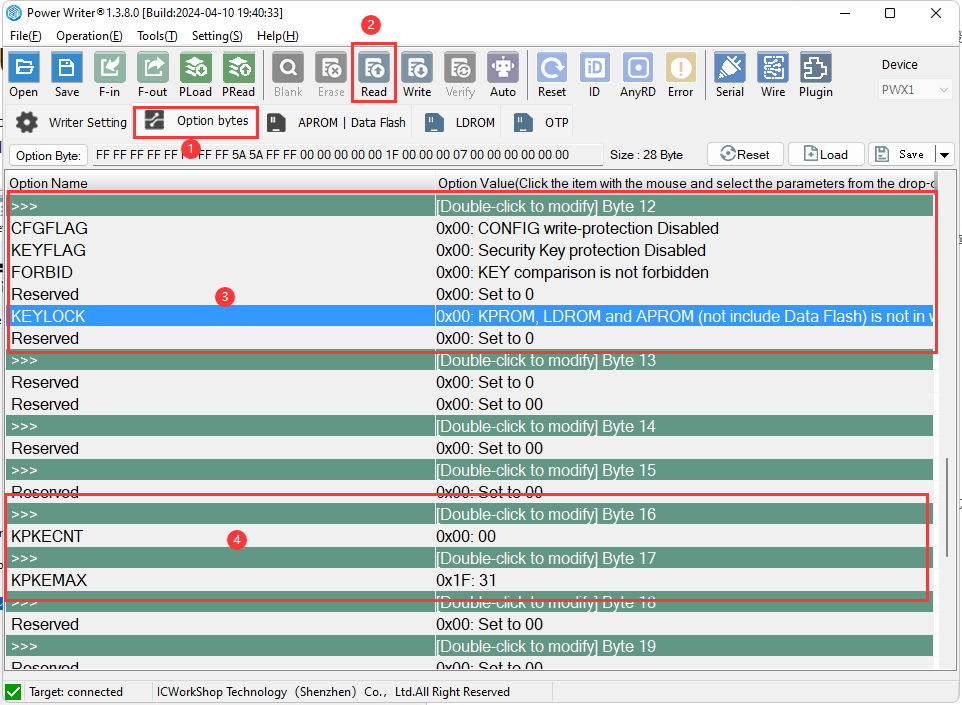
1.1:KPROM status reading
Connecting the chip and reading the option byte allows you to get the status of the KPROM.
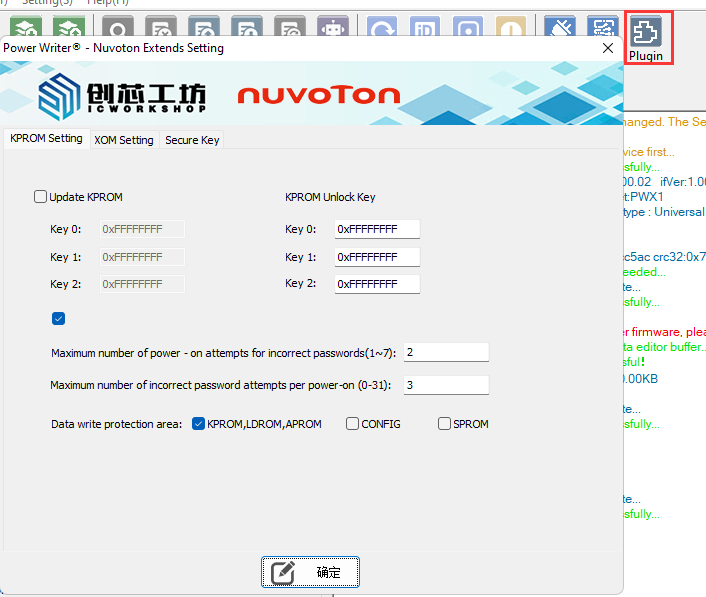
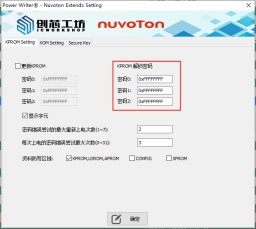
1.2:KPROM Unlock Password Setting
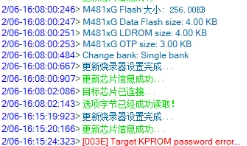
When the security key protection is enabled, the LDROM and APROM are in write-protected state, and if you want to write to them, you must enter the correct KPROM unlock password, or report an error. When the option byte CONFIG write protection is enabled and the option byte is to be written, an incorrect entry of the KPROM unlock password triggers a full chip erase.
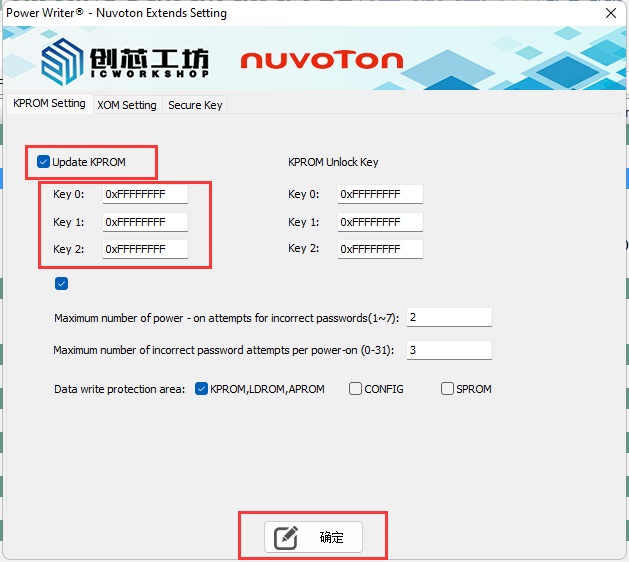
1.3:Update KPROM password
When you want to update the KPROM, you must check both Update KPROM and Security Key Enable, the KPROM is written with the option byte, and clicking Write Option Byte will operate the KPROM; the
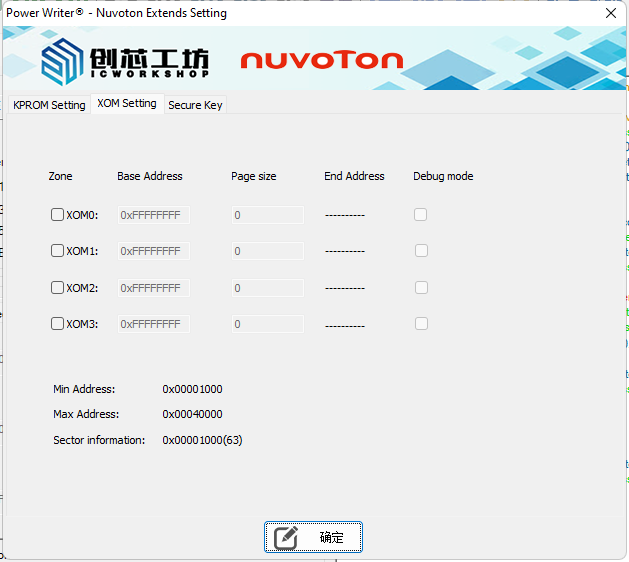
2:XOM Config
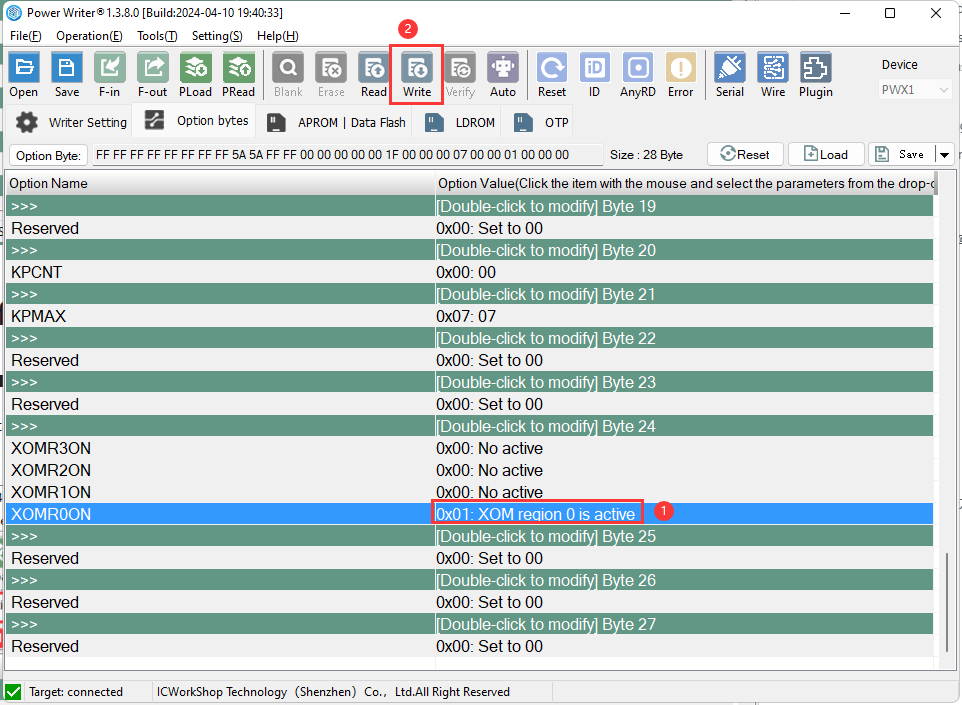
2.1:XOM status reading
You can get the activation status of the XOM by selecting the corresponding chip model, connecting the chip and reading the option byte:

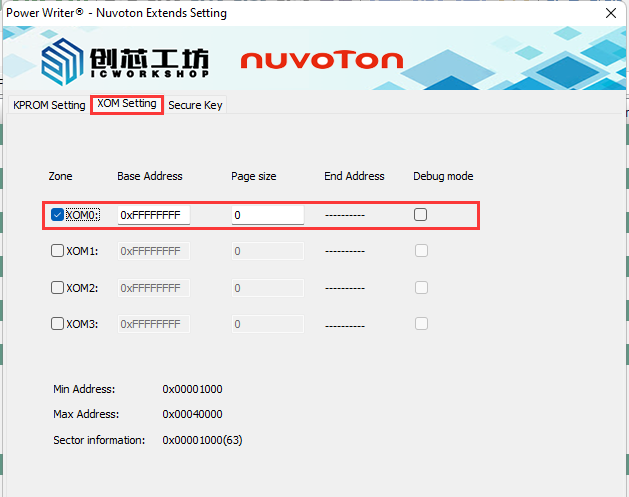
2.2:XOM Configuration Write
Fill in the address to be read-protected, you must check both the enable area and the XOM area to enable, and finally click the write option byte.
3:Security key
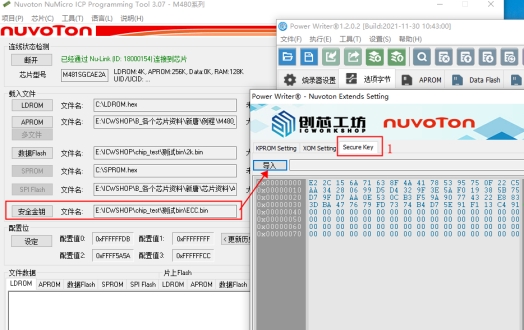
3.1:Import of security keys
Import the security secret key in Secure Key, the procedure can be found in: Nuvoton NuMicro ICP Programmer User Guide.pdf.
3.2:Configuration and write security keys
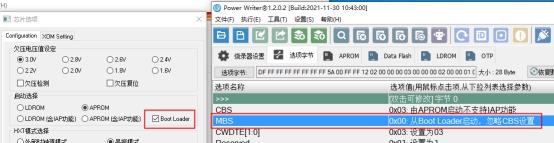
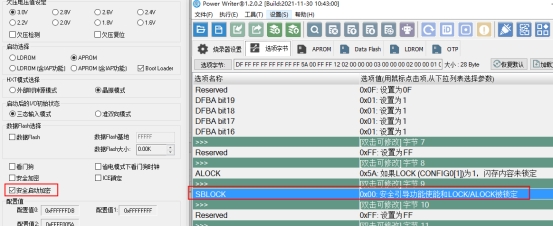
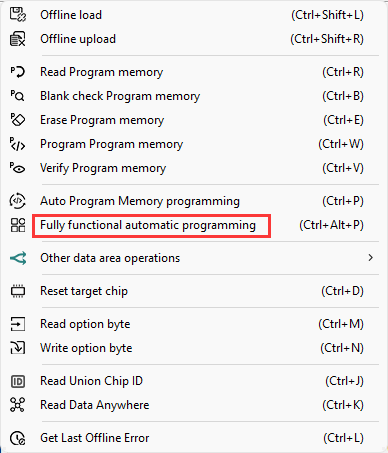
Check BootLoader Boot and Secure Boot Encryption, then click Write Options Byte, you can add firmware and then click Fully Automatic Programming;
4:Secure Setting
4.1:Secure config
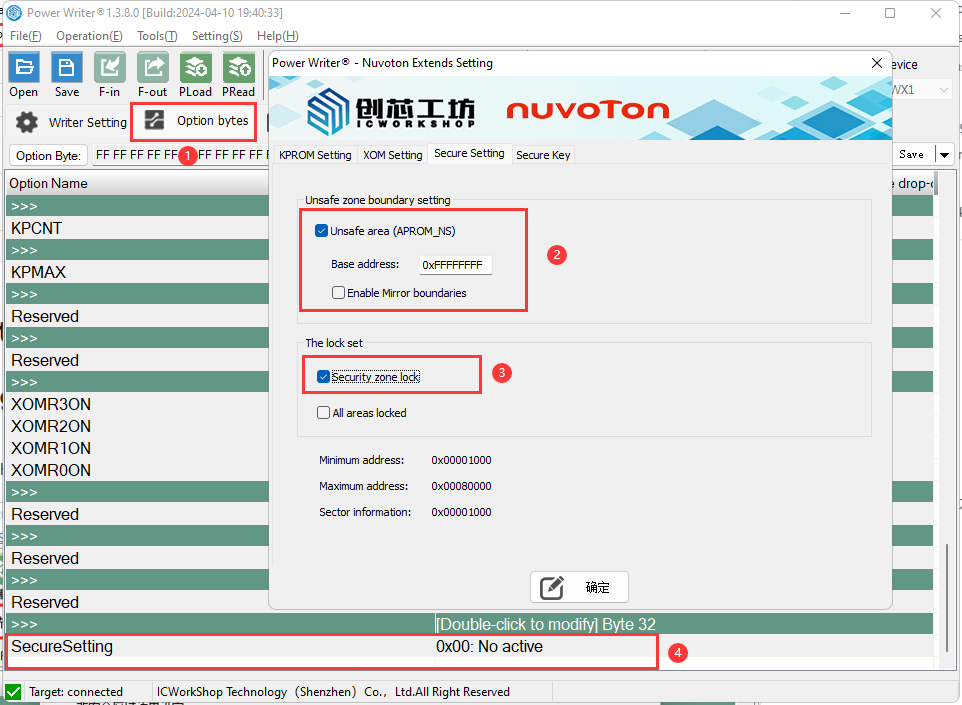
Here we take the M2351 as an example, open Extended Settings, select Start Non-Safe Area, write the Non-Safe Area address, and turn on the Safe Area setting in the Options byte:
4.2:Secure Area Unlocking Method
After locking the setting settings, the chip will not be connected, you need to click on Restore Defaults to write the option byte

5:MTP Configuration
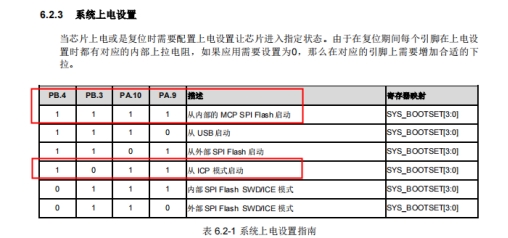
5.1:MTP Notes
MTP setting belongs to the specific function of NUC505, when the programmer is connected to the chip, the PB.3 of the chip needs to be pulled down to make the chip start from the ICP mode; after the programmer is finished, the PB.4,PB.3,PA.10,PA.9 can not be pulled down for the program to start normally.
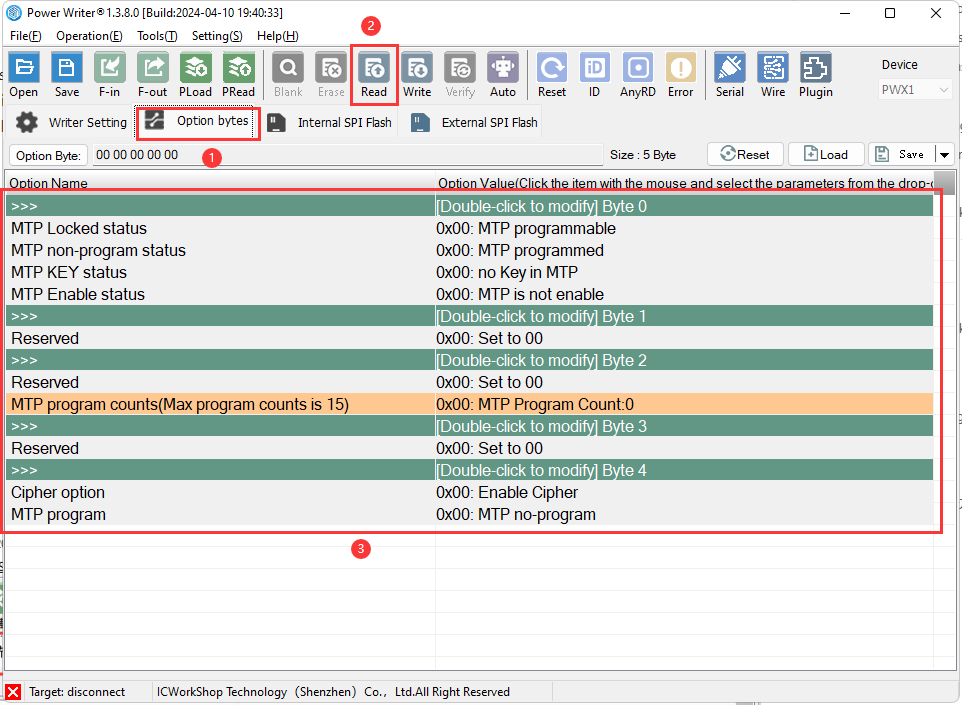
5.2:MTP status reading
Connect the chip and read the option byte to get the activation status of the MTP:
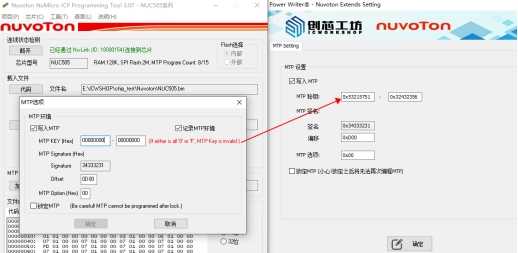
5.3:MTP Config
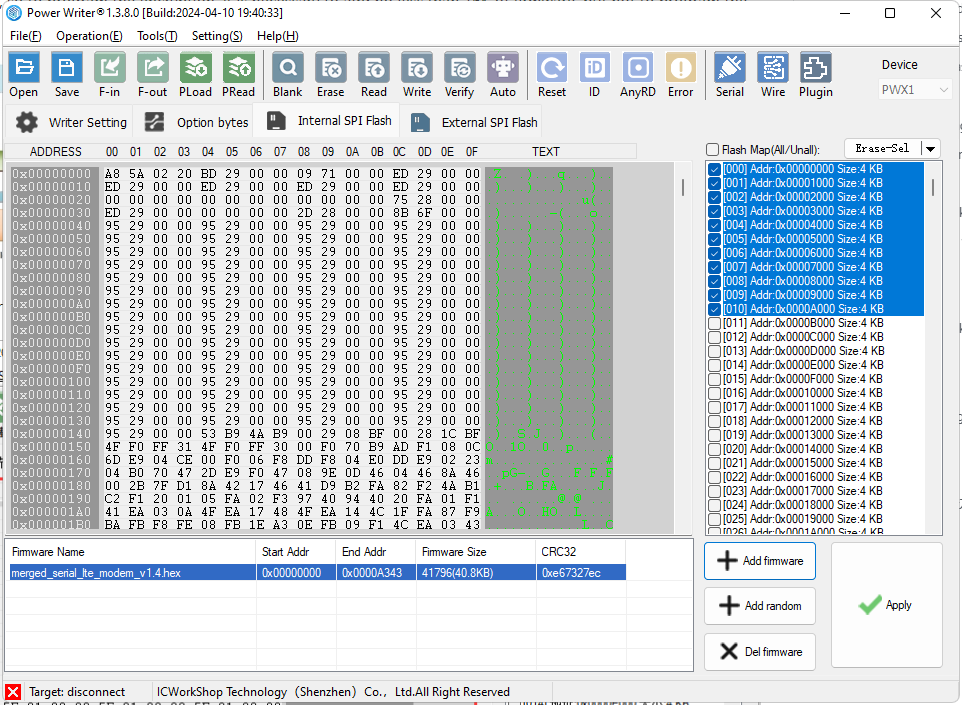
Fill in the correct value in MTP Setting in Nuvoton Extended Settings, and when you need to update MTP, you need to check both Write MTP and MTP Programming.
MTP 秘钥: 0x53215751 -0x32432356 //This is filled in randomly, with non-all zeros and non-all ff
const uint32_t signature __attribute__((at(0x00000d00))) = 0x34333231;//The program firmware needs to be customised by setting the signature at the offset address
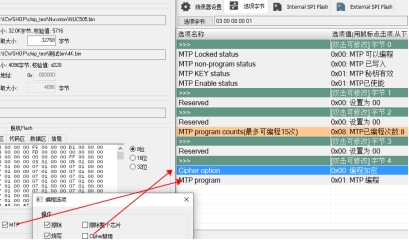
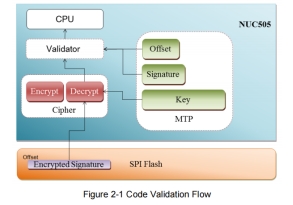
Code Verification is automatically activated when the MTP is programmed.The code on the Flash (or file to be written to SPIFlash) must pass through the Code Verification stream.The NUC505 searches the 0 to 16 KBSPIFlash of the offset address (or file to be written to SPIFlash) to check that the correct signature is present on the offset address (compare to the data in the NUC505 MTP). data for comparison, see Figure 2-1). If there is no signature, the boot or programming operation will fail. This protection mechanism is called off-chip memory protection, so to program the encryption, it is necessary to add no less than 16K of firmware, but not to program the encryption:
Add plaintext firmware when using programmed encryption.
When not encrypted by programming, you can read the encrypted firmware save as first, then add it.
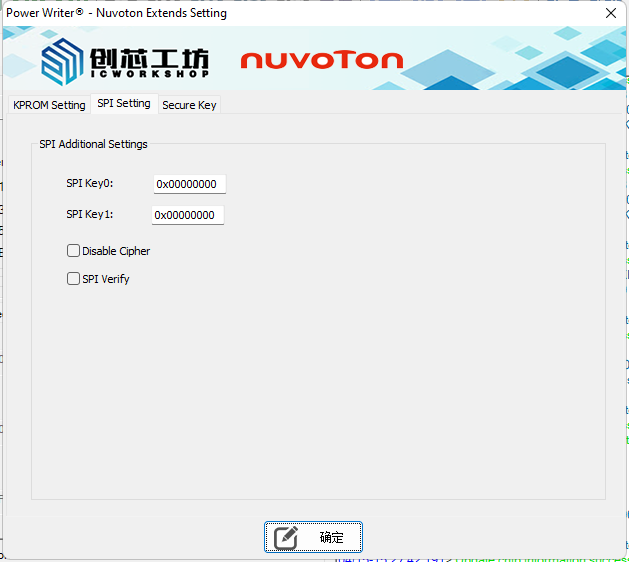
6:SPI Flash encryption settings
6.1:SPI Flash Encryption Setting
Select the corresponding chip, for example, M485xI, open the extended settings and select SPI Setting, fill in the non-zero values for secret key 0 and secret key 1, and then the chip will be encrypted and programmed automatically when you are sure to programming it.