3.1 Debugger
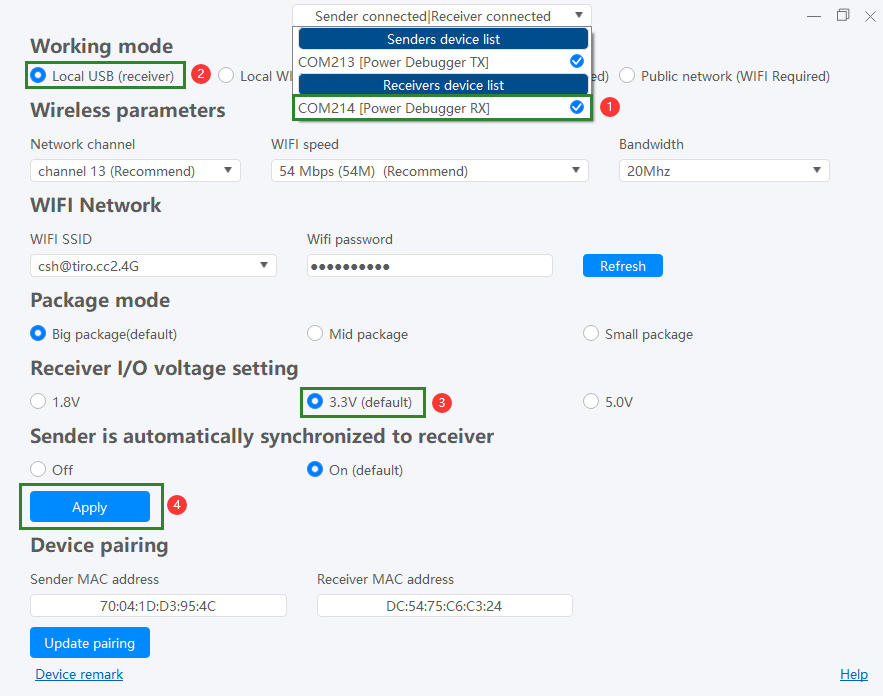
3.1.1 Local USB mode
- Connect the Power Debugger receiver device (Whether the transmitter is connected or not )
- Set the working mode to Local USB (receiver).
- Check the I/O voltage (default is 3.3V).
- Then apply the Settings.
3.1.2 Local WIFI direct connection mode
- Connect the transmitter and receiver
- Select Local WIFI Direct connection mode
- Adjust network channel, wireless speed, bandwidth and other Settings (Generally default )
- Adjust the packet mode (default large packet mode, can provide higher speed, small packet mode can provide better stability)
- IO voltage (default 3.3V, mainstream scheme)
- Set synchronization (enabled by default), change the parameters of the transmitter, will be synchronized to the receiver
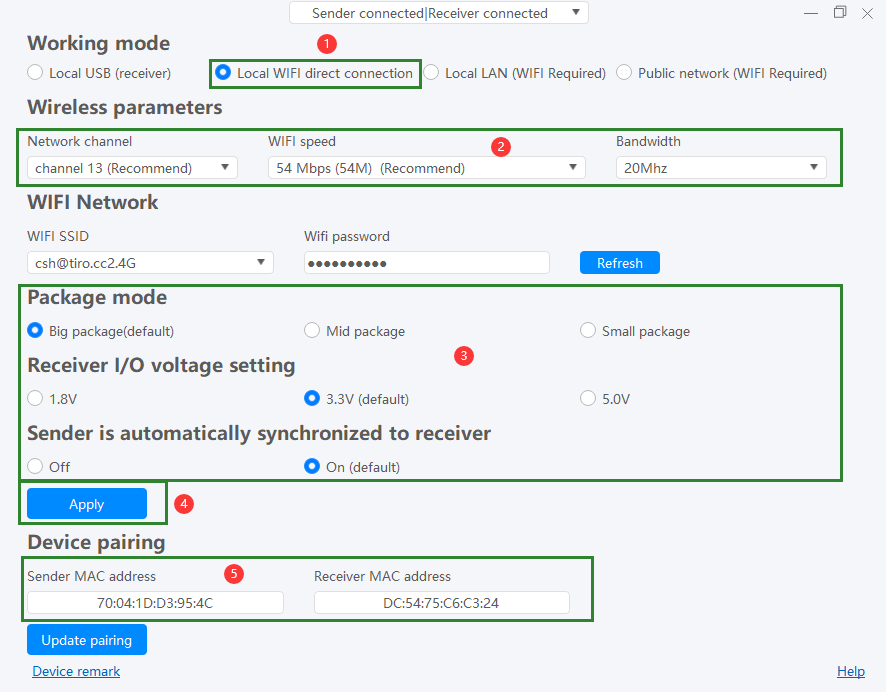
As shown below, high-speed mode is recommended.
See the full debugger setup tutorial and FAQ Debugger setup tutorial
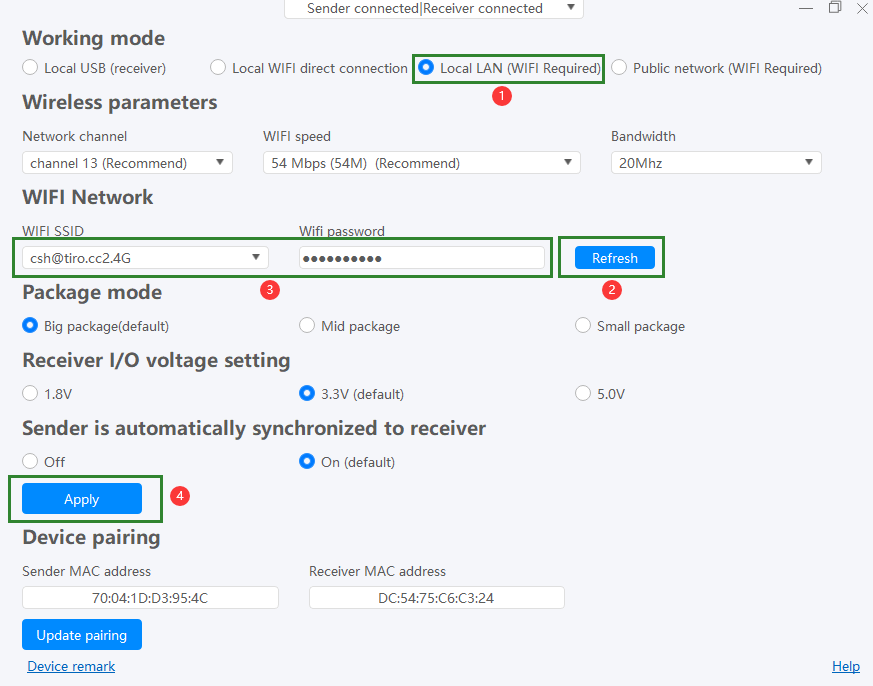
3.1.3 LAN mode (network required)
In LAN mode, in addition to the need to set the working mode to LAN mode, you need to configure the SSID and password of the wireless network, as shown in the following figure:
- LAN mode is associated with the response real-time of routing, such as the delay of large delay, unable to find the equipment and other problems, please check the routing setting, restart the router when necessary, or the device, if necessary, contact us in time.
- In LAN mode, data is encrypted.
- After the synchronous setting, please check whether the green status light of the transmitting end (receiving end) is on (if it is on, the communication is normal).
- This section describes other parameters in LAN mode Direct local WIFI connection
3.1.4 WLAN mode (Network required)
In public network mode, in addition to setting the working mode to public network mode, you need to configure the SSID and password of the wireless network, as shown in the following figure:
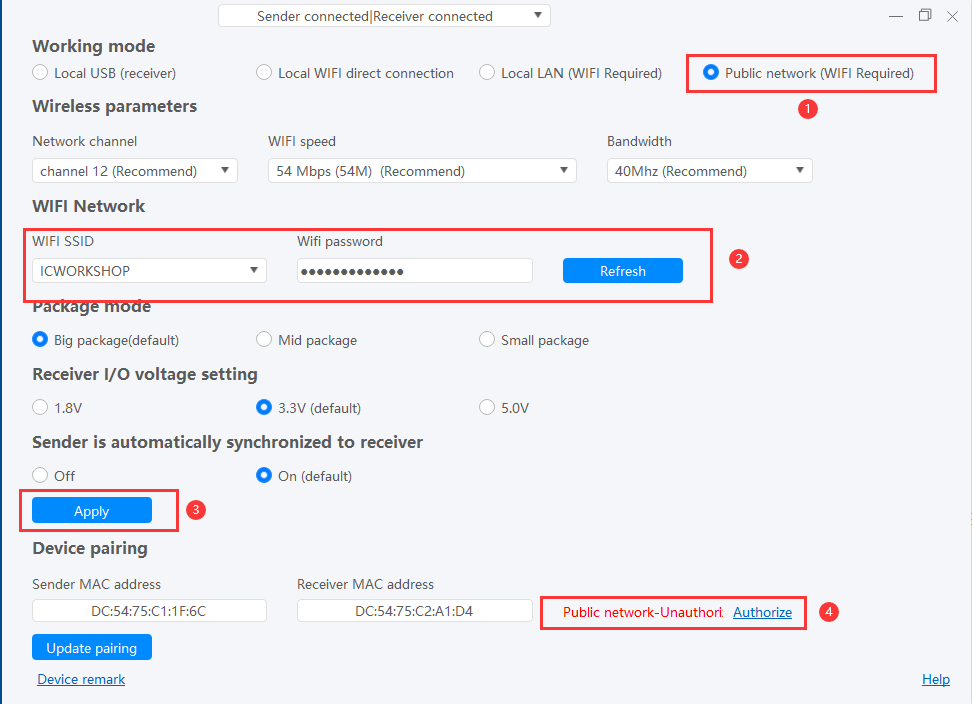
- Public network mode is closely related to the real-time and stability of the network. ICWorkshop will provide the platform CDN server node(Open Beta), which can stabilize the real-time debugging in most parts of China (North, Central, South and East China) at present, and some parts of West, Southwest and Northwest China have high delay, so it does not provide overseas public network debugging service for the time being.
- In WLAN mode, data is encrypted.
- After the synchronous setting, please check whether the green status light of the transmitting end (receiving end) is on (if it is on, the communication is normal).
- In public network mode, the device authorization is required, See Account.
- This section describes other parameters in public network mode Direct local WIFI connection
- The first update of the Settings requires a public network test to establish the lowest delay route, which takes a long time (>15 seconds), after the test is complete, the current Settings are saved so that the best Settings can be used, and the optimal route can be retested by re-updating the Settings to the transmitter and receiver to clear the Settings.
- The current product has no plan to provide P2P connection mode.
3.1.5 Supplementary statement
3.1.5.0 Bluetooth applet in LAN and public network mode
We chat mini app can be used to quickly distribute the network and switch the working mode of the device, see Mini-App
3.1.5.1 Check the connection before use
No matter what mode the device is in, the constant green indicator indicates that the device is successfully initialized. If the green indicator blinks, it indicates that the connection fails. Check the device mode and ensure that the transmitter is paired with the receiver.
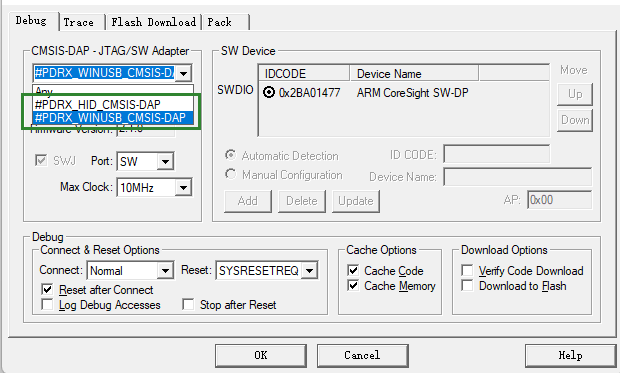
3.2.5.2 WINUSB mode
In the debugger selection screen, you can see the dual-mode debugging equipment:
- HID channel, standard mode.
- WINUSB mode, high speed mode.
As shown below, high-speed mode is recommended.
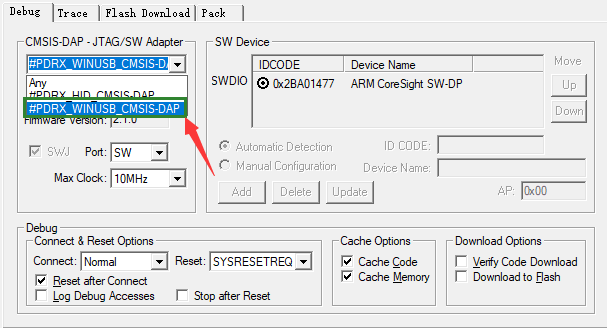
If the device is not recognized or the WINUSB channel is not recognized, try updating the driver,See Drive installation,If it can be used normally, no installation is required!
See the full debugger setup tutorial and FAQ Debugger setup tutorial
3.2.5.3 Supported development environment
Refer to 2.1 Characteristic | IDE