3.1 PowerWriter® Configuration
3.1.1 Descriptive
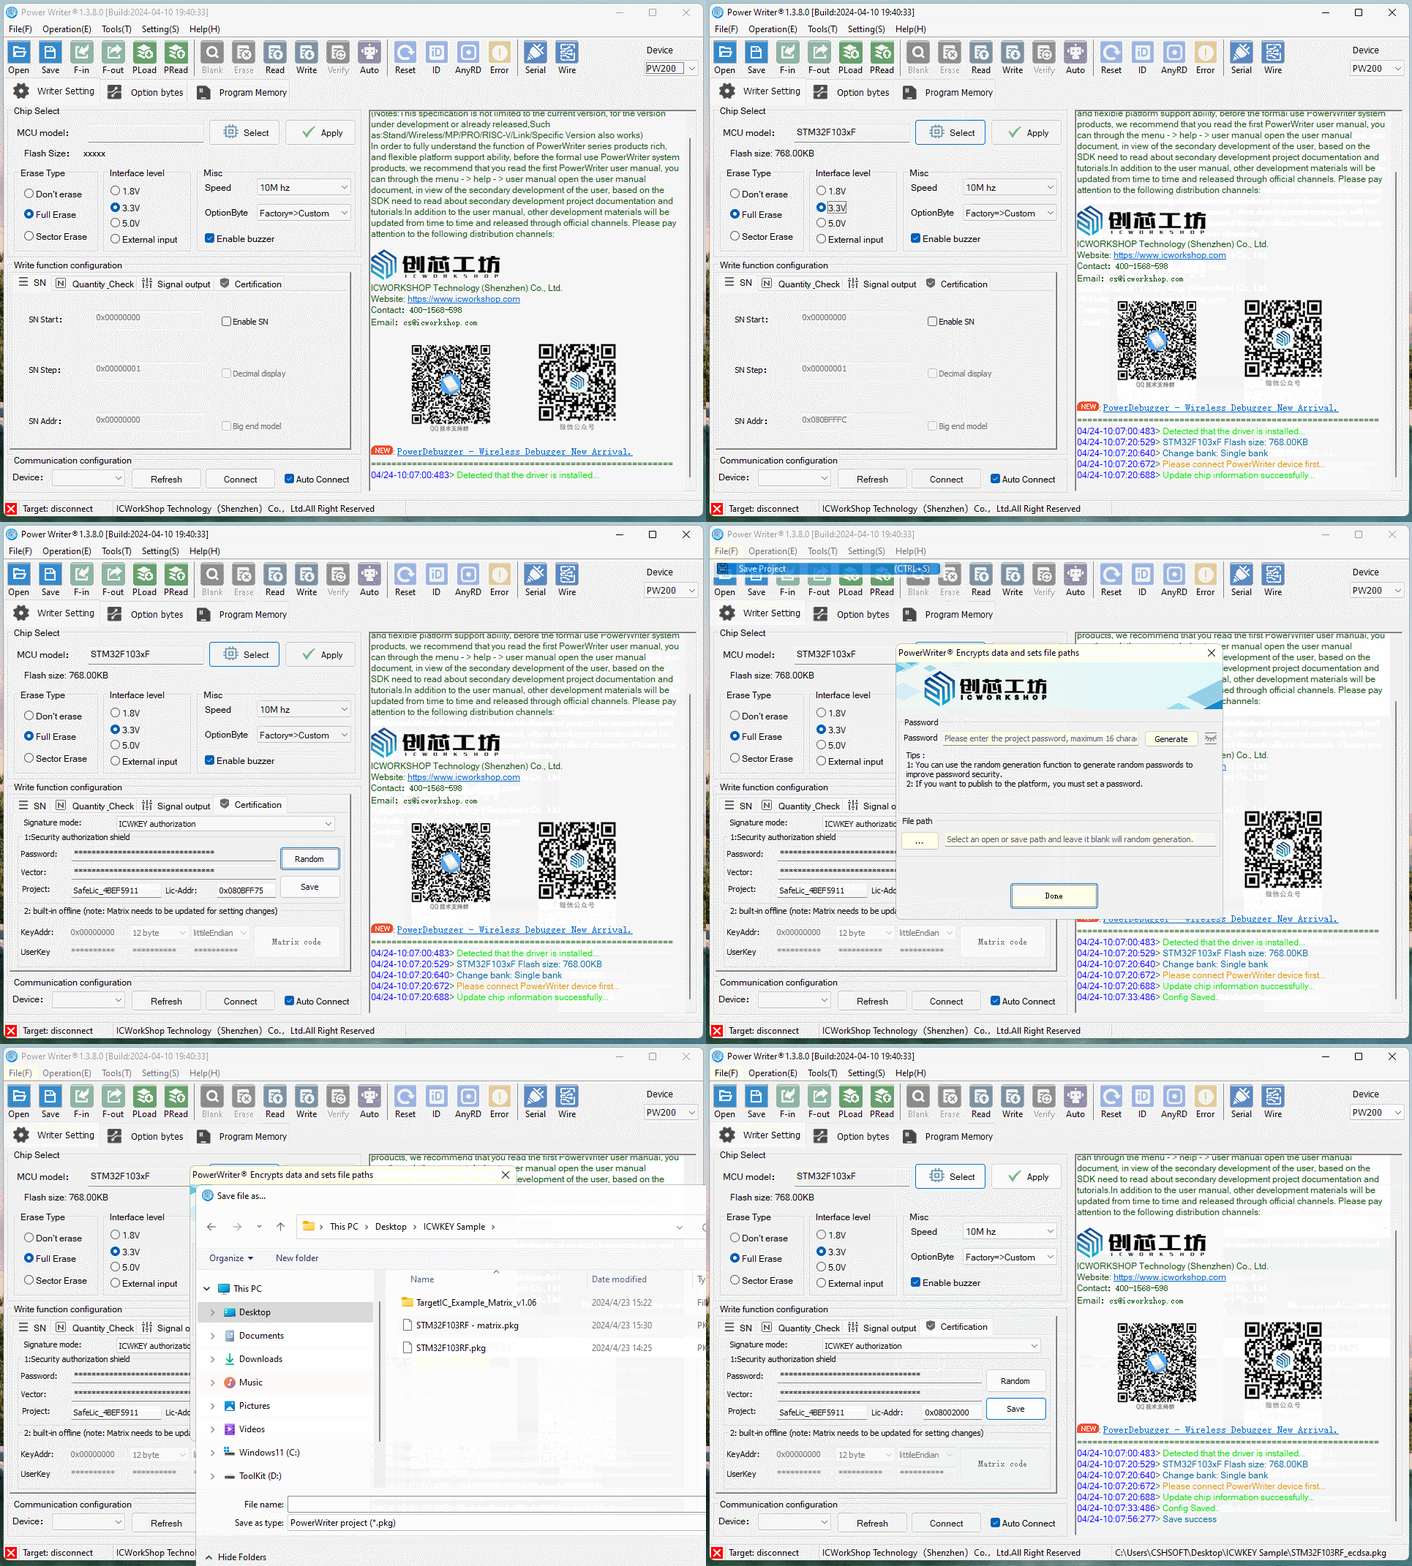
ICWKEY needs to be used with PowerWriter®, both must use the same project name and communication key in order to complete the communication, in addition to the PowerWriter® side needs to be configured to sign the write address.
3.1.2 Configuration
The configuration process is referenced below:
- Open the PowerWriter® software and load the existing project or select the chip that needs to be signed to create a new project.
- Select Burner Setup Page -> Authorization & Signature -> Please select from the Signature Mode field: ICWKEY authorizations(or lock mode).
- Modify authorization address: modify the authorization address to the address where the signature information is actually stored(location stored in the firmware, e.g. setting to 0x08002000 means that the signature information needs to be stored at location 0x08002000).
- When you are finished setting up, save the PowerWriter® project to avoid losing information.
caution
- The authorization address is the address where the signature information is actually stored, which is different for each item. When PowerWriter® selects the chip for the first time, the address will be set to the end of the firmware.
- After the setup is complete, save the PowerWriter® project so that the configuration information is not lost and the ICWKEY device cannot be connected.
- Locked Mode Additional Note: Locked Mode prevents the communication configuration from being viewed and modified again after the next reload of the project (the signature address can be modified).
3.1.3 Demonstrations
A demonstration of the configuration process on the PowerWriter® side is shown below.
