5.9 esp32远程下载教程 - Macos
1、ESP官方提供的esptool.py串口超时赋值小,远程下载程序时因为网络延迟或者波动导致频繁失败,不适用于网络访问因此对esptool.py修改超时。
2、PowerDebugger针对ESP远程下载进行升级和优化。
1. Python下载&安装
1.1 下载并安装
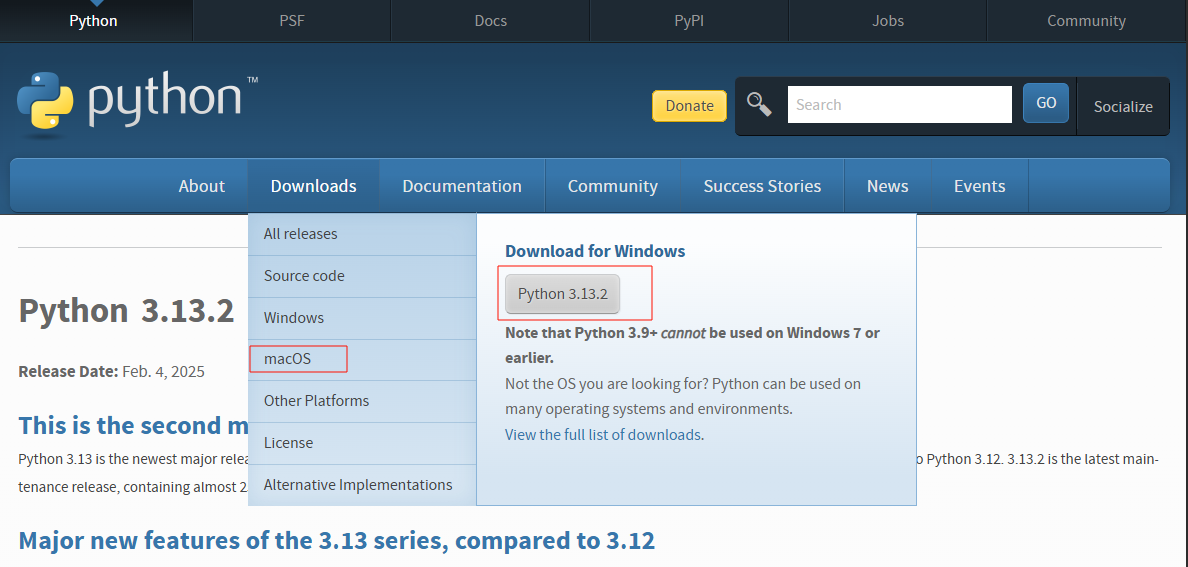
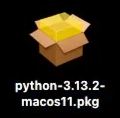
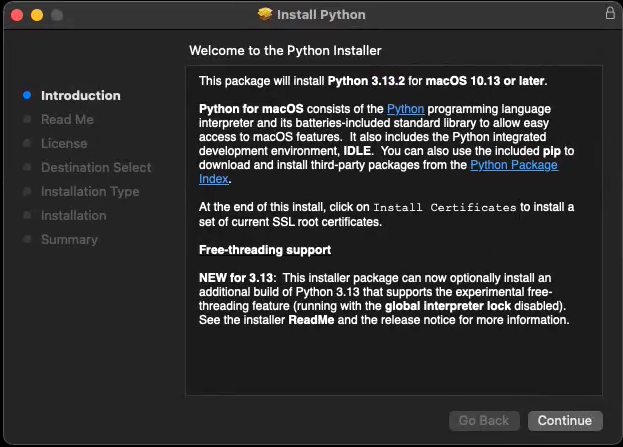
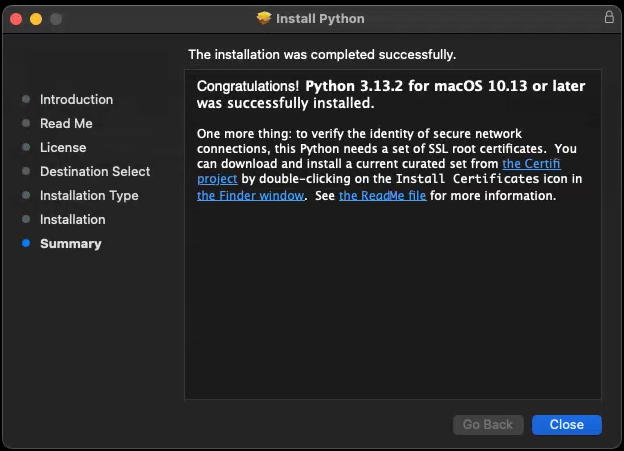
1.1.1.访问Python官方网站 https://www.python.org/ 下载适合MacOS的Python安装包(通常是.pkg文件),打开下载的.pkg文件,按照安装向导进行安装。(以下示例中的Python版本为3.13.2版本,其余版本可自行测试验证)
1.1.2.安装完成后,打开终端,检查Python版本。
启动终端
$ python3 --version
1.2 安装必要依赖
1.2.1.更新PIP
$ pip3 install --upgrade pip
1.2.2.安装intelhex
$ pip3 install intelhex
1.2.3.安装pyserial
$ pip3 install pyserial
pip下载安装过程出现超时错误,是因为pip 的网络请求超时时间较短。可以通过增加超时时间来解决该问题:
$ pip3 --default-timeout=1000 install xxxxx
其中 --default-timeout=1000 将超时时间设置为 1000 秒。
2. Esptool 安装|克隆
2.1 PIP下载
启动终端
$ pip3 --default-timeout=1000 install esptool
$ esptool --version
2.2 克隆源码
启动终端
$ git clone https://github.com/espressif/esptool.git
Esptool 在线文档:Esptool.py Documentation - ESP32 - — esptool.py latest documentation
Esptool git地址:GitHub - espressif/esptool: Espressif SoC serial bootloader utility
3. 调整Esptool超时
针对远程下载固件时由于网络状态不确定,需要手动调整esptool.py串口超时配置。
配置文件所在路径 macOS /Users/<user>/.config/esptool/
Macos:
#!/bin/bash

CONFIG_DIR="$HOME/.config/esptool"
CONFIG_FILE="$CONFIG_DIR/esptool.cfg"

if mkdir -p "$(dirname "$CONFIG_FILE")" ; then
    echo "Directory created successfully."
else
    echo "Failed to create directory. Exiting."
    exit 1
fi

cat <<EOL > "$CONFIG_FILE"
[esptool]
timeout=180
sync_timeout=10
md5_timeout_per_mb=80
erase_region_timeout_per_mb=80
erase_write_timeout_per_mb=80
mem_end_rom_timeout=10
serial_write_timeout=10
connect_attempts=10
write_block_attempts=10
EOL

echo "Esptool configuration file created at: $CONFIG_FILE"
read -p "Press Enter to continue..."
保存到esptool_config.sh,设置文件权限并执行。
启动终端
$ cd ~/Desktop
$ chmod +x esptool_config.sh
$ ./esptool_config.sh
配置文档:Configuration File - ESP32 - — esptool.py latest documentation
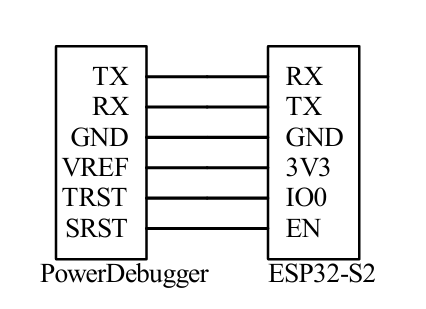
4. 接线
5. PowerDebugger 安装 & 设置
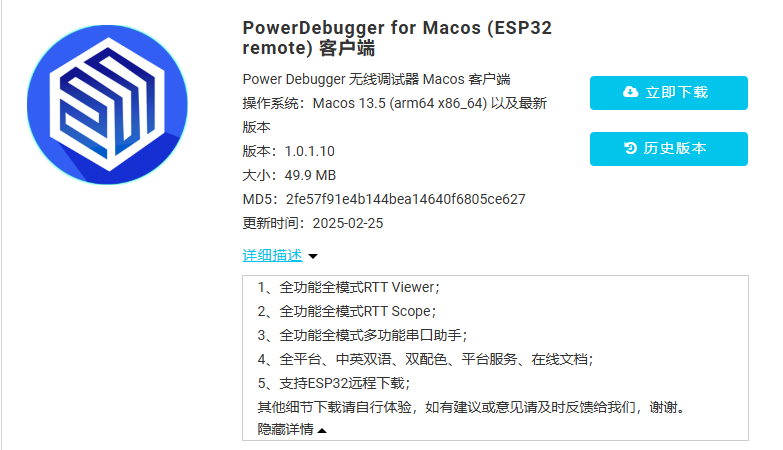
5.1 安装PowerDebugger(ESP32 remote)定制版
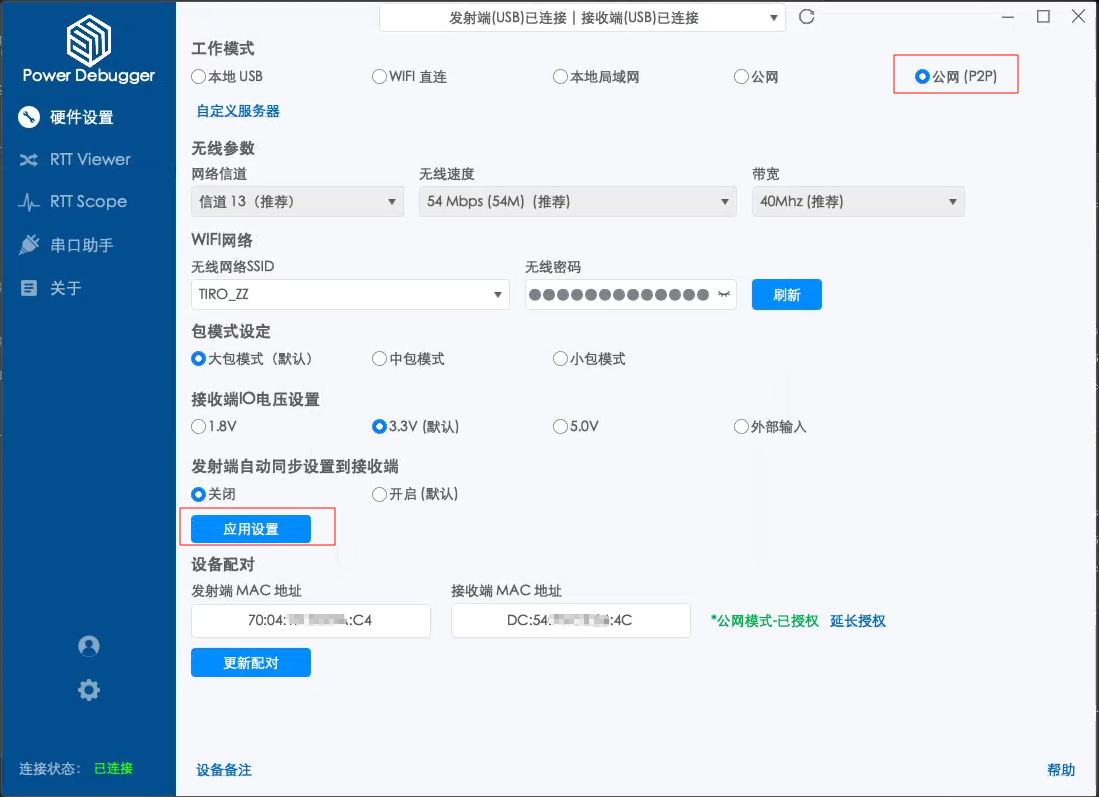
5.2 使用公网(P2P)工作模式
5.3 固件版本更新
支持ESP32远程下载,发射端和接收端固件需要升级定制的 V1.0.27版本。

客户端切换到正式版本:
下载正式版本重新安装。
固件切换到正式版本方法:
打开客户端【关于】页,分别快速并且连续点击发射端和接收端【固件版本:】8次,即提示固件升级对话框,点击【确定】进行更新固件。
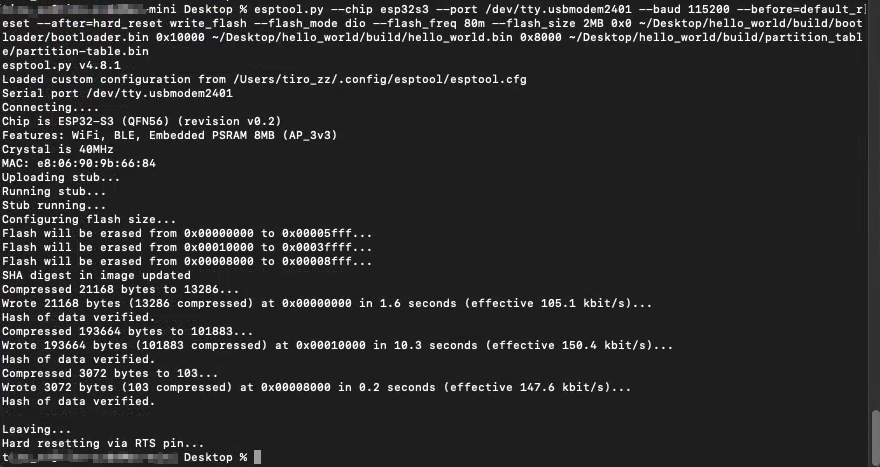
6. 终端执行Esptool下载
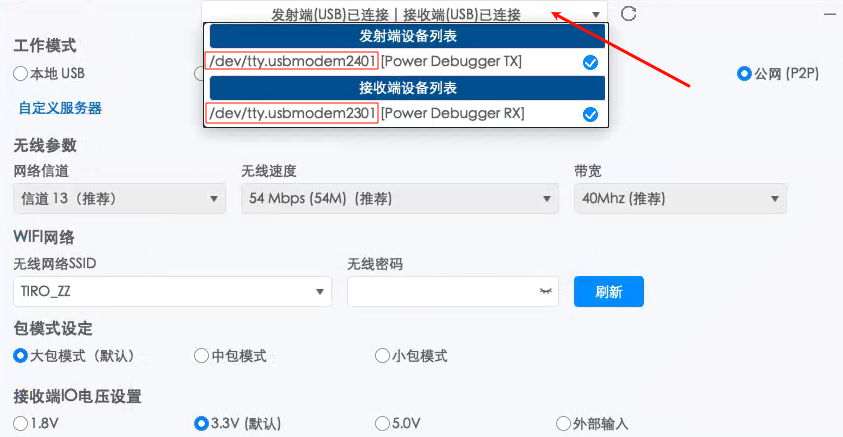
6.1 查看串口号
Macos下串口号通常为: /dev/tty.usbmodemxxxx
6.2 执行下载
(v4.8.1版本以及更高版本的esptool.py均支持,其他版本可自行测试验证)
$ esptool.py --chip esp32s3 --port /dev/tty.usbmodem2401 --baud 115200 --before=default_reset --after=hard_reset write_flash --flash_mode dio --flash_freq 80m --flash_size 2MB 0x0 ~/Desktop/hello_world/build/bootloader/bootloader.bin 0x10000 ~/Desktop/hello_world/build/hello_world.bin 0x8000 ~/Desktop/hello_world/build/partition_table/partition-table.bin
7. VSCode运行并调试Esptool
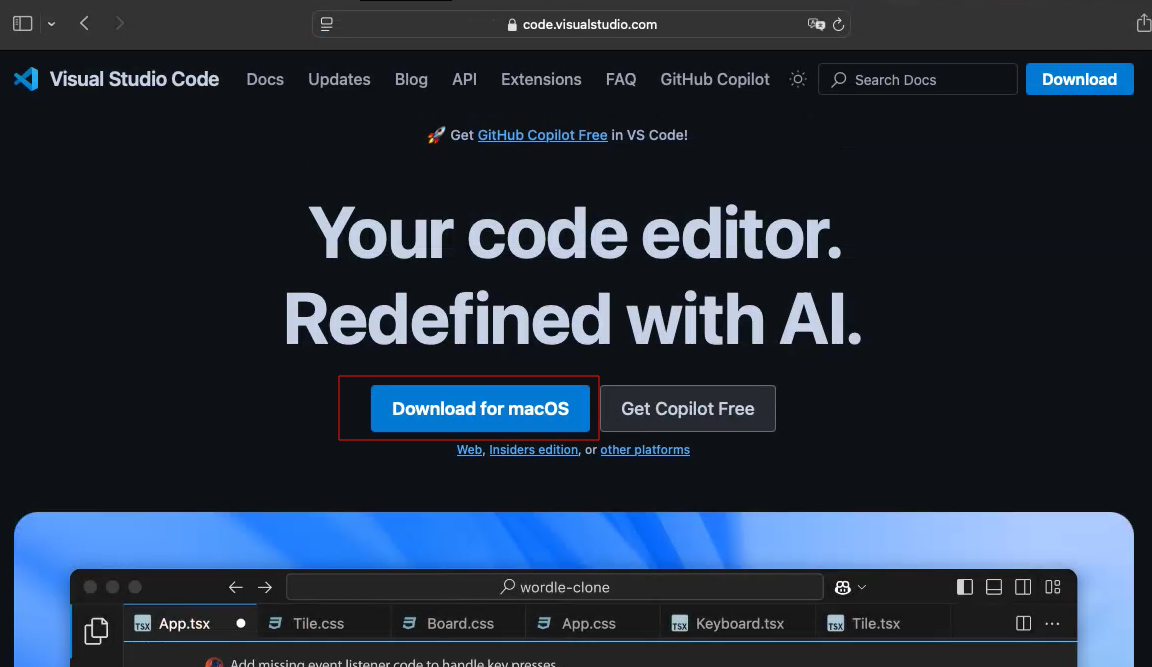
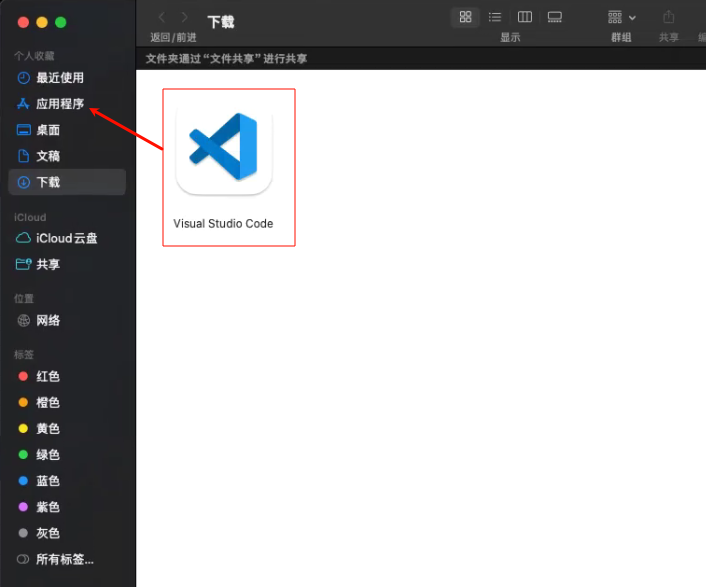
7.1 Macos安装VS Code
访问VS Code官方网站[Visual Studio Code - Code Editing. Redefined],首页会根据浏览器访问信息,自动判断当前平台,自动切换到适合当前平台的软件版本。
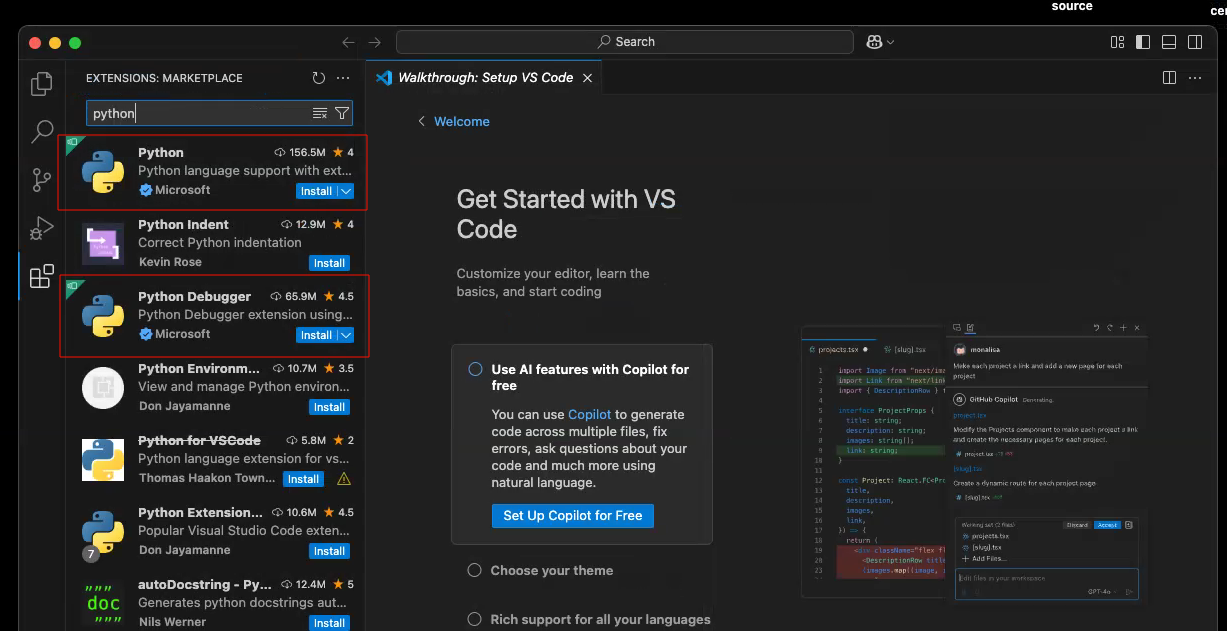
7.2 安装扩展插件Python 和 Python Debugger
7.3 运行和调试esptool
7.3.1.VS Code打开esptool.py所在目录,运行和调试添加配置。
{
    "version": "0.2.0",
    "configurations": [
        {
            "name": "Python Degbug: esp32tool",
            "type": "debugpy",
            "request": "launch",
            "program": "esptool.py",
            "console": "integratedTerminal",
            "args": [
                "--chip", "esp32s3",
                "--port", "/dev/tty.usbmodem2401",      // PowerDebugger sender serial port number
                "--baud", "115200",
                "--before=default_reset",
                "--after=hard_reset",
                "write_flash",
                "--flash_mode",
                "dio",
                "--flash_freq", "80m",
                "--flash_size", "2MB",
                "0x0",
                "~/Desktop/hello_world/build/bootloader/bootloader.bin",
                "0x10000",
                "~/Desktop/hello_world/build/hello_world.bin",
                "0x8000",
                "~/Desktop/hello_world/build/partition_table/partition-table.bin"
            ]
        }
    ]
}
7.3.2.运行和调试(F5)。
